3/9/13

squeals of delight


around here at birthday time, it's ALWAYS ALL ABOUT the CAKE.

i was cruisin' around facebook and saw this cute little mud pool piggy cake thingy and my daughter perked right up and said she'd been wanting to learn how to make fondant anyway. (we watch too much Cake Boss.) this seemed like a perfect opportunity.

anyway, it turned out fantastic.

i looked up some fondant and modeling clay recipes and i am never thrilled if i have to use confectioner's sugar or corn syrup.  we settled on trying a recipe for modeling chocolate substituting honey for corn syrup in the traditional recipes.

most of the "experts" also specified that if i wanted to color the chocolate, i should use paste colors which i didn't have access to.  i used the standard liquid for the pink the color of the pigs, but it was only a few drops and it didn't seem to cause a problem.


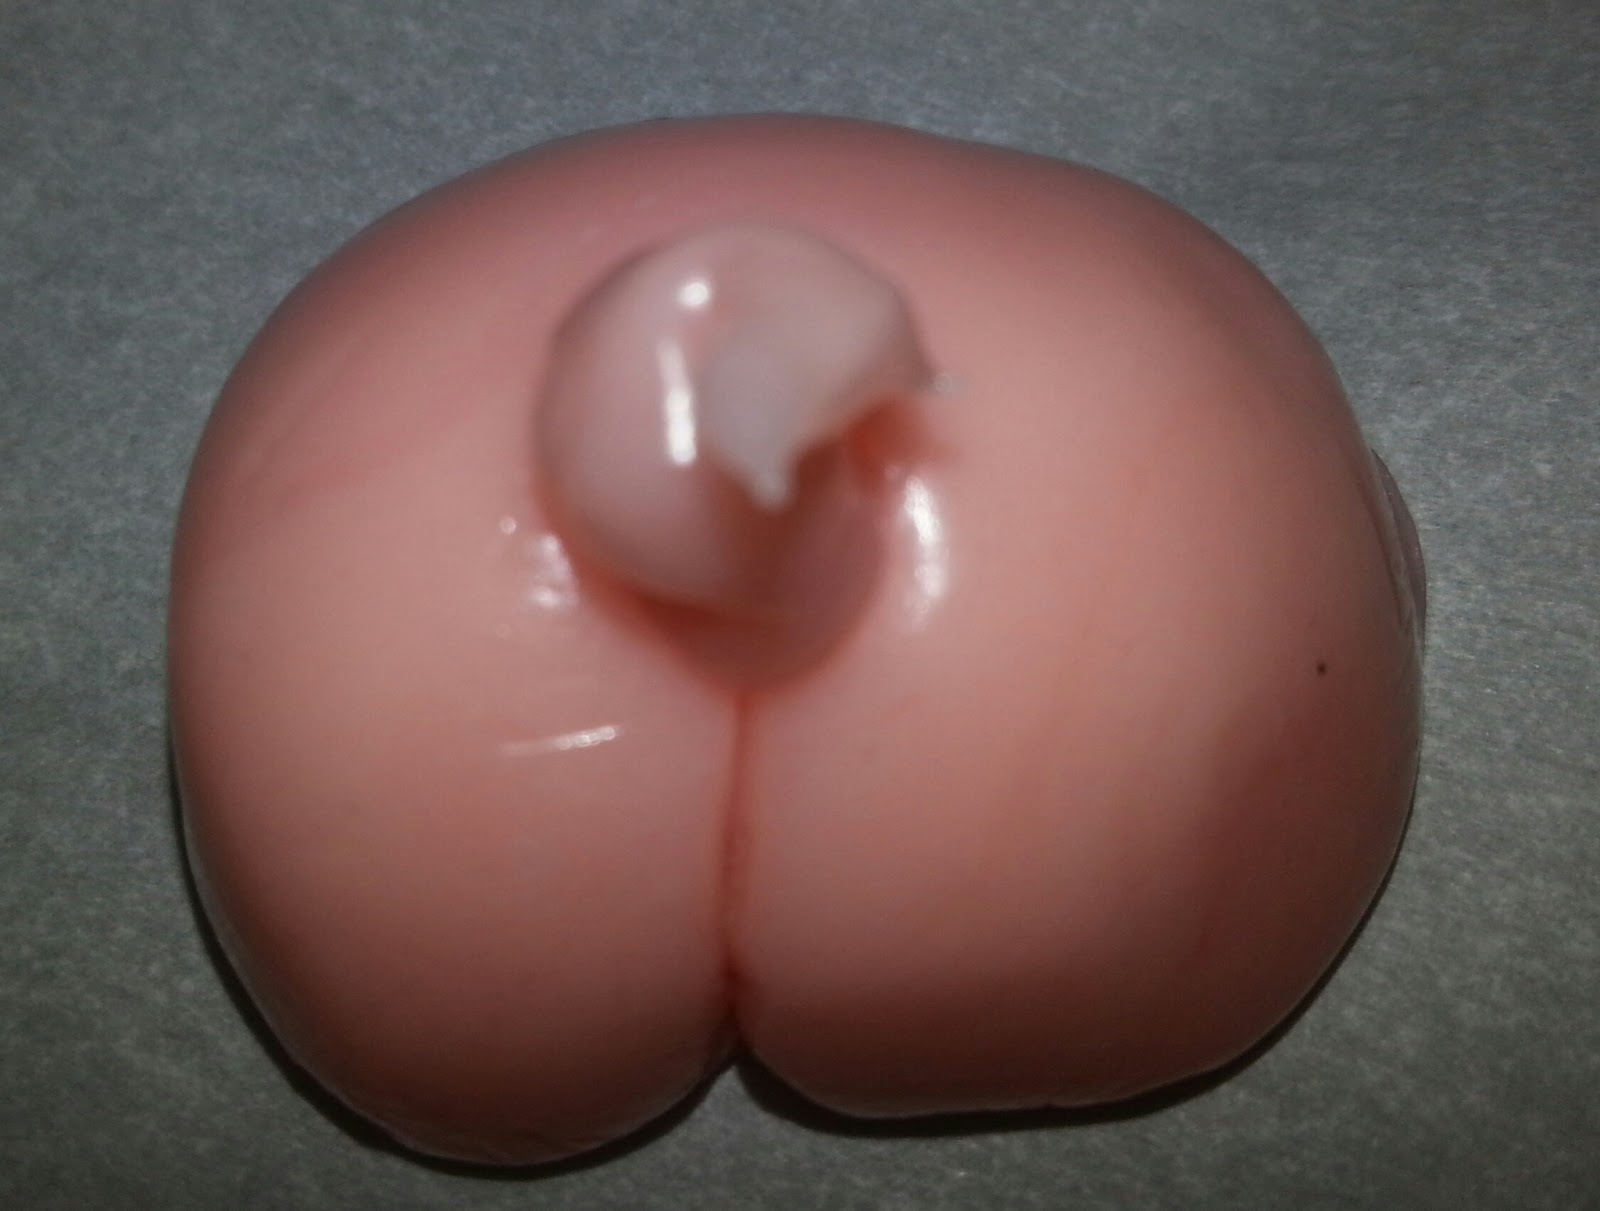


modeling chocolate recipe

4 Tbsp raw honey
1 bag (9 oz) of white chocolate chips

place the chocolate chips in a glass bowl and place on top of a sauce pot which contains some steaming (moderately boiling) water.
stir until well melted.
add food coloring and continue to stir.
remove from heat.
add honey and stir a bit more until combined.
cool a bit, so as not to heat up plastic wrap.
turn "dough" out onto plastic wrap and smash flat with plastic wrap.
wrap up and place into fridge for about 4 hours to overnight.

TADAH!

we used this recipe and found that it was a bit hard to work with, so i reheated and added another Tbsp of honey.  it blended well and it didn't curdle or separate.  we just had to put it back in the fridge for awhile.  you might have to work with the amount of honey a bit to get it the right pliability (is that even a word?), but if it gets a bit too soft, put it back in the fridge for a bit and pull it out again when it hardens.  also, you might try using a cold cutting board or cookie sheet to use as your table top so that it doesn't heat up to quickly.

for this beautiful cake, i swiped a GRAND recipe from one of the better recipe sites and i have officially claimed it as my own.  LOL  (the grandkids will never know.)

here's the link to give proper credit.
http://www.food.com/recipe/the-only-chocolate-cake-recipe-youll-ever-need-devils-food-26370

here's the recipe...in case that link ever vanishes.

cake

directions:


  1. Preheat oven to 325°F.
  2. In a large mixing bowl, sift together dry ingredients. Add oil, coffee and milk and mix at medium speed for 2 minutes. Add eggs and vanilla and beat 2 more minutes. Expect batter to be thin.
  3. Pour into a 9" x 13" greased and floured pan or 2- 9" round pans. Bake 9 x 13 pan for about 45 minutes or 9" pans for about 30 minutes. Cool in pans for about 15 minutes and then cool completely on racks.
  4. Frost as desired.
NOTE:  because olive oil is so darned expensive, i tried half olive oil (1/2 cup) and half applesauce (1/2 cup) the second or third time i made this cake and it turned out fabulous!   i even left the eggs out once by mistake and although the cake was a bit pitted in the middle, it STILL tasted fabulous.
 
for the mud, i used a simple chocolate ganache...the recipe is under my donut recipe at this link.

http://healthybratt.blogspot.com/2010/04/doughnutsdonutsoh-wow.html

we decided to really spruce it up with some canned cherry pie filling crammed between the layers.  this isn't a necessary step but it sure made it taste good.

for the barrel, we used, standard, toxic, get-em-from-walmart-for-a-dollar, wafer cookies.  we "glued" these to the cake with a bit of ganache and then tied a cord around when we were finished for extra support. once the cord comes off and you start cutting, it does get a bit flimsy, but nobody complained.


1/23/13

sourdough pancakes...no knead bread style


it all started about 100 years ago when i first decided i wanted to make bread. i ruined thousands of loaves of bread and pulled out as many hairs from my head trying to get it right. okay, maybe it wasn't thousands of loaves, but it still felt like thousands of hairs. my head really hurt, for weeks, months, as many as two years--thinking back. and i finally got it right.

not only did i get it right, but i've decided to branch out. not just bread, but sandwich, whole wheat, sourdough and even (insert menacing beat here) pancakes.

i thought i had pancakes perfected because nobody here was complaining and then i heard somebody say sourdough pancakes. well...why not? i'd tried almost everything else. but why would i want to make sourdough pancakes when the pancakes i was making were splendiferous?
well, i thought of a couple of reasons.
>>>they don't require any baking powder. regular pancakes take quite a bit because the flour is heavy.
>>>less oil. hey, this is a big deal. olive oil is expensive as are butter and any other good fat you can buy or obtain in this economy.
>>>less milk. hey, this is always a plus.
>>>less preparation time...ok, this was the deal maker. i still have to make the dough ahead, but i don't have to make it ahead (immediately) 2 hours before the meal. i can make it any time during the week (or two) that i want to make these and just pull the wad of dough out of the fridge when it's time to cook; throw in a few extras and go.

so...i save money AND time...where's the catch? i couldn't find one, so i gave it a whirl.

now, to be fair to those who sweat and fuss over the real deal...sourdough made from wild yeasts in the air, i am not a point where i need to take on another "pet." i already have 3 cats and 6 scoby's that i am currently feeding. i think, for now, that's enough. so where did i get my "sour" dough?

gwen was kind enough to share this "no knead" bread recipe on her lovely blog sometime ago. you can find the recipe here. i was intrigued. i tried, first her basic recipe with white flour and quick rise yeast and i was an instant success. (note: if you are a beginner, you might want to stop here, visit gwen's blog and start with her recipe. it's easy, it's cheap and it's a guaranteed success. this is always a good place to start if you're not familiar with bread making or sourdough in it's most basic [cheater] form.)

success! sourdough bread in a couple of days with maybe 5-10 minutes worth of work. how can this be a bad thing? then i used it for pizza. WOW. my family thinks i'm indispensable at this time. but that wasn't enough.

i already have a wheat grinder and it would be a shame, not to let my grinder and my beautiful wheat berries jump in on the fun. i started experimenting with different mixes of whole wheat and white and different yeasts until i came up with an acceptable mix that has both texture and taste and only requires a bit more effort than the original.

now what about the pancakes? well, we'll get to that, but first you have to know how to make the dough. my current recipe (subject to improvements as i see fit) is as follows:

hb's no-knead bread (sourdough starter) recipe


3.25 cups freshly milled hard white wheat flour
3.25 cups unenriched, unbleached AP white flour
1-2 pkgs of plain yeast (i use hodgeson mill, but any brand should do and i've found that one package works as good as two so long as you let it sit on the counter for 18 hours before putting it in the fridge.)
3 cups of water
3 T apple cider vinegar
1-1.5 T sea salt


take the water and vinegar and mix in a glass bowl. add the whole wheat flour. mix until the flour is evenly wet. cover and allow to soak for 2 hours. after two hours, add the other flour, the salt and the yeast. mix until evenly wet and put into gallon jar (glass). at this point, it will be sticky. if it's not, you may have used too much flour. adding a spoonful of water might not be a bad idea at this point. cover the jar (loosely) and set it on the counter overnight. after about 18 to 24 hours, put it in the fridge for a few days. TA DA! you now have sourdough. not in the traditional sense of the word, but believe me if you leave it in the fridge for another 3 days, you'll smell the difference.

for all the nice perks and bonuses you can get from this bread, be sure and visit gwen's blog too. all of the pizza crust and pretzle dog baking instructions are over there. i bake my bread the same way she does too.

now..for the pancakes. just what you were waiting for, right?

take your beautiful, sour pet out of the fridge. take two cups of dough and throw it in a large mixing bowl. add 2 eggs, 1/2 milk, 2 T sugar, 2 Tbsp of olive oil and any flavoring of choice (cinnamon, vanilla, etc.) and beat the tar out of it with a whisk. because the dough is so heavy, it takes a little bit of effort to thin it out.


and when you're finished, it will be a bit on the lumpy side.


when you're sure it's mixed as mixed is gonna get, throw in the baking soda (1 tsp). mix well.

keep in mind, your griddle should have been preheating at this point and should now be hot and ready to go. spoon 1/4 cup of batter


onto the griddle and cook until the top side begins to dry and most of the bubbles have popped. flip and allow to finish cooking on the other side. serve as you would any other pancakes and be careful. you're bound to eat too many. i did.

hb's sourdough (no-knead bread) pancakes recipe


2 cups sourdough starter
1/2 cup milk
2 eggs
2 Tbsp olive oil
2 Tbsp sugar (or honey or whatever sweetener you prefer)
1 tsp baking soda


Mix all ingredients except baking soda in a large mixing bowl until mostly smooth. Add baking soda and mix well. Spoon by 1/4 cup-fulls onto hot griddle and cook.


see what they did to hubby? LOL


12/21/12

star baby afghan

found a very cool pattern on ravelry.

http://www.ravelry.com/patterns/library/beths-little-star-afghan

used some scrap yarn.  and because i used 3 different weights of yarn, it's a little "lumpy" in spots, but it really turned out better than i expected.  here's the pics!


these two are the underside.


11/17/12

more bathroom stuff

I'M FINISHED!!!!!!

well...almost. still have to finish some very minute things like a bit of trim work behind the toilet, but my big project is DONE! i wanted so badly for the last 6 years to do something nice with this shelf. i keep finding myself wandering into the bathroom admiring how wonderful it all turned out. what a blessing to have something that looks so beautiful and didn't break the bank.

i took an old painted shelf crafted out an old bay window in long past history and tiled it with the same vinyl squares that we put on the floor. i then picked some darker-than-white paint to trim around it and the rest of the bathroom. the pictures should pretty much speak for themselves, so have a gander below.

before


after


disclaimer:  caution must be taken when reading my blog.  i'm a new creature and the Lord continues to mold and shape me through his will.  older entries may seem to contradict the newer ones.  there's a pretty good chance that they do for two reasons.  first, because of my nature, as i strive for perfection, i will continue to fall short of the mark and should therefore be thankful for his grace and should seek his (and your) forgiveness for having been so foolish in the past.   second, i continue to grow in him; and as changes are made, i have made attempts to change my blog to reflect those changes. in this event, please refer to #1.   if you're interested in perfection, my blog isn't the place to be.  pick up a king james bible (yup, i'm one of THOSE people) and read his PERFECT word.